Integrity Tutorial: Getting Started
This tutorial aims to help you with your first steps using Integrity. It covers everything from installing Integrity into Eclipse, the creation of a project and a simple test fixture and finally calling that fixture from your very first test script. With that as a foundation, you can then embark on an insightful quest of learning the more advanced features of Integrity by yourself - or read some of the tutorials demonstrating these features...erm, well, you may read them as soon as they're written ;-)
For simplicity reasons, we will create a plain Java project here. Integrity can also be used in an OSGi environment, but all the fixture and test script related things work exactly the same in that case, so you will probably still get something out of this text even if you plan to do OSGi.
Prerequisites
For a start, you'll need an Eclipse installation (I highly suggest to use the newest release with the newest Integrity version). Pretty much any variant that can be used for Java development should do.
As Integrity is based on Xtext, you'll need to have at least the Xtext runtime dependencies in your Eclipse. Fortunately, the newer Eclipse versions (4.5 and up) already include Xtext, so there is usually no further action required. If you use an older version (possibly with an older Integrity version as well), you might need to add the Xtext update site from the projects' website and install the runtime dependencies from it.
Installing Integrity
Integrity can easily be installed via an update site as well. Head over to the Download Page, where the update site URLs are to be found!
You will find multiple URLs for Integrity there - this is because the current version concept does consist of having one development version (for example 0.15.0) which is constantly being changed due to new features, and the previous version being the "release" version (for example 0.14.x). The release version generally only gets bugfixes, and if a new bugfix release is being published, the third part of the version number is raised (for example 0.14.0 -> 0.14.1). Thus you can expect the release version to be a lot more stable than the development version.
For this tutorial, I'd suggest to install the latest release version.
Setting up the project
Now you'll first create a standard Java project in Eclipse. For traditional reasons we'll simply name it "HelloWorld" :-)
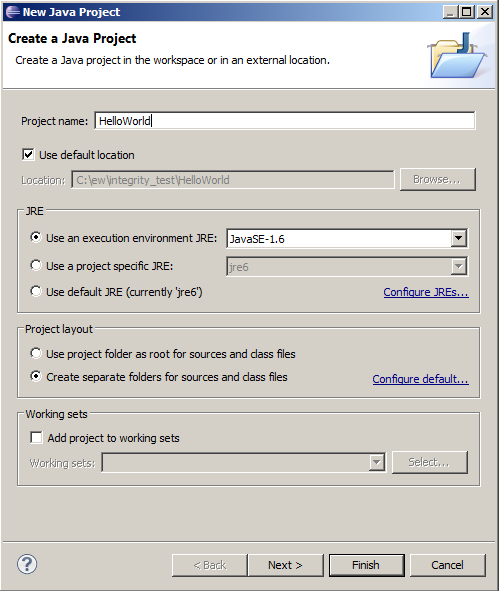
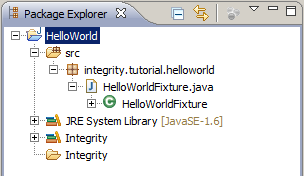
Up until now, there's nothing special. You should have your project set up like this now:

Next, we're going to add the dependencies required for Integrity. This is pretty simple because there's a classpath container which automatically adds all necessary libraries for us. Choose Properties > Java Build Path > Libraries and add the "Integrity Test Runner" library:
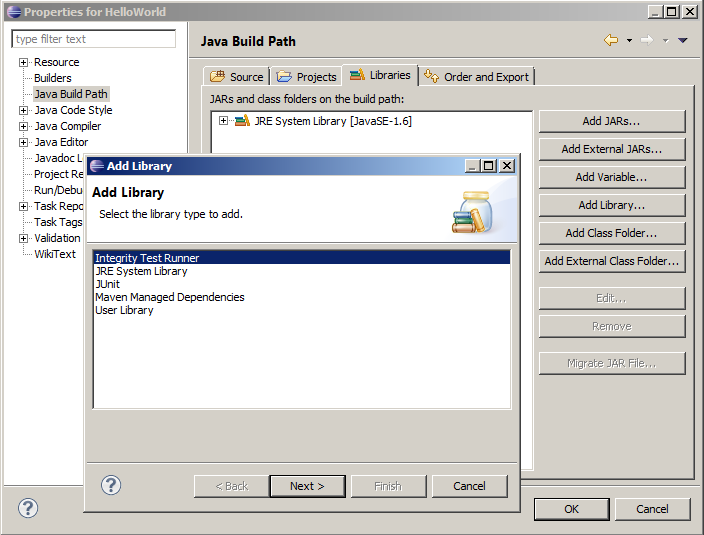
Afterwards, you will have quite some Integrity and Xtext libraries taken from your Eclipse installation on your projects' class path:

Writing your first fixture
With the project set up, the next task is the creation of a fixture. A fixture is basically a plain Java class - there's nothing special about it, it just needs to conform to a few rules:
- The class has to be instantiable (that is, non-abstract) and have a public no-arg constructor. (Actually, this isn't entirely true, as you can create special factories to create fixture instances instead of having Integrity instantiate the fixture class, but that's an advanced topic which won't be covered here)
- The class needs to have one or more public methods annotated with the @FixtureMethod annotation. These methods are the core of the fixture class, and they contain the code to be executed during testing.Though fixture classes are not very special from a Java perspective, they're the glue between your System Under Test (SUT) and Integrity. The fixture methods get called from the Integrity Test Runner (ITR), and the responses from the fixture method calls are compared with reference data in the Integrity test scripts in order to determine whether a test is considered successful or not.
Create the package integrity.tutorial.helloworld and therein the class HelloWorldFixture with the following content:
package integrity.tutorial.helloworld;
import de.gebit.integrity.fixtures.FixtureMethod;
import de.gebit.integrity.fixtures.FixtureParameter;

public class HelloWorldFixture {
          @FixtureMethod(description = "Add $first$ and $second$")
          public Integer addition(@FixtureParameter(name = "first") Integer aFirstNumber, @FixtureParameter(name = "second") Integer aSecondNumber) {
                    return aFirstNumber + aSecondNumber;
          }
}
There's a single fixture method in this class: addition - which just adds two parameters and returns the result. So, yes, we're going to test whether your computer can add numbers correctly ;-). But besides that simple functionality, there are some more notable things in this little piece of code:
- The @FixtureMethod annotation denotes that the following method is a fixture method. But it also contains a description string - this (optional) string is used by Integrity to create nicely readable test reports. For this purpose, you can put placeholders into the description string which are then replaced with the actual parameter values at runtime. The placeholders are encapsulated in $ signs and refer to the name of the respective parameter, which is given in the...
- ...@FixtureParameter annotation, which has to be added to each parameter. It has a required name property that you can use to name this parameter. Name it well, since you'll refer to the parameter by this name in all your test scripts :-) but beware: the name MUST start with a lowercase letter and contain no spaces, pretty much like Java variable/parameter names. (By the way: the name property is mandatory because Java classes don't contain method parameter names, so Integrity cannot access these names at runtime)
Writing your first test script
Having the fixture in place, you can now create an Integrity test script which uses that fixture. For this, create another folder in your project called "Integrity":
Now create a file inside that folder:
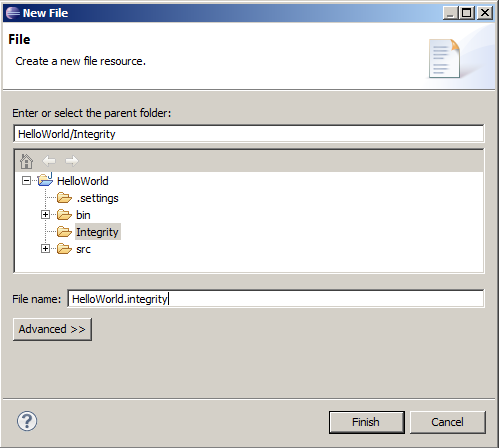
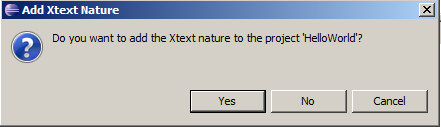
It is very important that the file ending is ".integrity" - Eclipse recognizes that ending and offers to add the "Xtext nature" to your project. Since Integrity is built upon Xtext, this is a requirement to gain full editing support for the Integrity test language in Eclipse, thus you should answer the question with "yes":
Now enter the following into the file you just created (hint: while you enter the test script, play around a little bit with autocompletion - you'll most likely be very pleased to see that it works in a useful way in many circumstances :-) ):
packagedef hello with
          testdef addition uses integrity.tutorial.helloworld.HelloWorldFixture#addition

          suitedef rootSuite with
                    test addition first: 1 second: 2 = 3
          suiteend
packageend
Reading this short script is pretty simple: it defines a test suite with name rootSuite inside a package named hello. Inside that suite, a single test is being done: whether the addition of 1 and 2 equals 3. More precise, this is what happens: the test addition is defined to be linked to the fixture method addition in the class integrity.tutorial.helloworld.HelloWorldFixture. Then a call is made at runtime to that method, with the two parameter values 1 and 2, and the result of that call is then compared to the value 3.
Executing the test
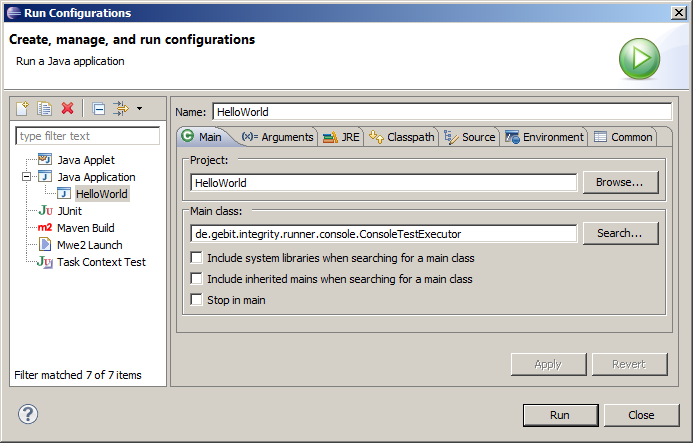
It's time now to put your hard work to good use: you will run your test suite. Integrity delivers a simple console program that you can use for test execution; it's main class is de.gebit.integrity.runner.console.ConsoleTestExecutor. (Actually, this console program is just a thin wrapper around the main classes of the test runner which parse the test model and execute it afterwards. It is suitable for simple use cases, but you are definitely encouraged to write your own wrapper around those, as you will have to in certain more complex cases, like when testing OSGi-based applications.)
Create a launch configuration to run the ConsoleTestExecutor:
In order to tell the test runner what to do, you have to add some program arguments:
-x result.html hello.rootSuite Integrity
The first two parameters enable HTML result logging and provide a result filename. The third parameter is the name of the root suite, that is, the suite which is executed by the runner. This suite must then call into any other test suites you want to execute. The fourth parameter (and any following ones, as there can be multiple) denotes the directory where to find the .integrity script files. This directory is searched recursively, and all files with the correct suffix are included.
Now launch the test runner. You should see an output like this on the console:
Loaded test resource 'C:\ew\integrity_test\HelloWorld\Integrity\HelloWorld.integrity': 0 errors.
Resolving the test model...done!
Test execution has begun...
Now entering suite 2: hello.rootSuite
Now running test 1: Add 1 and 2...
SUCCESS!
Now leaving suite 2: hello.rootSuite
Finished executing 2 suites with 1 tests and 0 calls in 62 msecs!
1 tests finished sucessfully, accompanied by 0 failures and 0 exceptions.
Transforming Integrity Result XML to HTML...done in 0.352 seconds!
That's it, you just ran your first Integrity test :-)
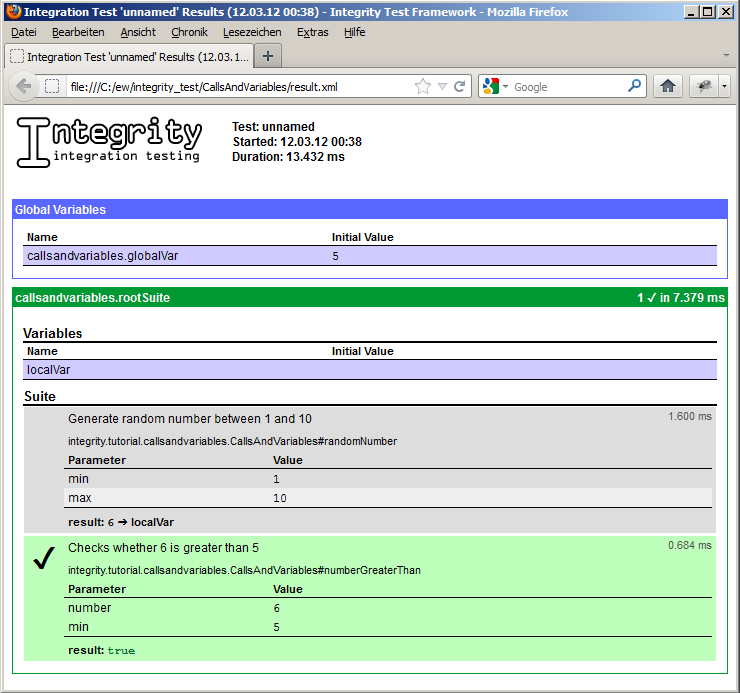
Since that's a nice feat, you should definitely reap all the rewards, and the console output is just one way in which Integrity reports its results. Remember the HTML filename you provided earlier? The HTML output is the second, more beautiful variation (and more machine-readable as well, actually - you could even switch this to a pure XML output with inline XSLT that transforms it on-demand to HTML, but that doesn't work correctly in all browsers, especially not in the Internet Explorer). It should look like this (after you opened the test detail "drop down"):
Experimenting...
That's it - the first tutorial ends here. You have successfully created a simple test project and executed a simple test. That's a start, and if you like, you can now experiment with your project a little bit. Try to use different values for parameters, like strings or decimal numbers. You could play around with variables in Integrity scripts, and "call" fixtures, which may also return something that is not tested against a given value, but may be stored in a variable for further use. Or try to segment your test execution into multiple suites that call each other, and place them into multiple packages (which may even be placed in separate files, if you like it that way).
Another option would be to continue with the second tutorial: Calls and Variables :-)